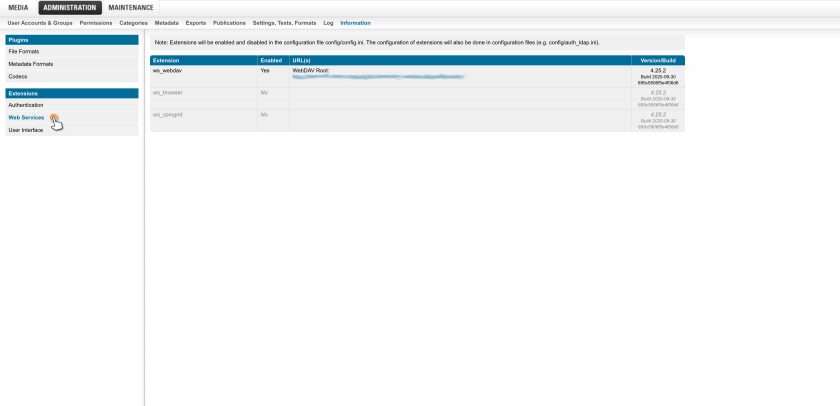
Web Services & Authentication
Set up the WebDAV interface
With the help of the WebDAV interface, you can access your data just like you access a network drive (reading and writing).
WebDAV is an open standard and is directly supported in Microsoft Windows, Apple Mac OS X and other systems.
Categories correspond to directories and file names correspond to the original file names of your files (which you can, of course, change as well).
Tip: Under Interaction and Integration we have compiled an informative overview of all interfaces and authentications.
Activate WebDAV
Back to topThe extension is activated by an entry in config.ini:
config.ini
[extensions]
ws_webdav=ws_webdav.ini
Insert this entry or remove the comment character (“;”) in front of the existing entry.
ws_webdav.ini
Edit all other options here; these are described in detail in the file itself.
Using WebDAV
Back to topWebDAV integration in Mac OS X
Back to top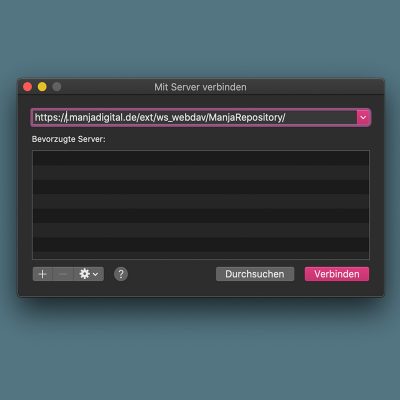
In the Finder menu “go to”, select the command “connect to server”.
In the following dialog, enter the WebDAV URL and click on “connect”.
You will be asked to enter user name and password; enter the user name and password for your Manja user account here.
Configurate Mac OS X Performance
Back to top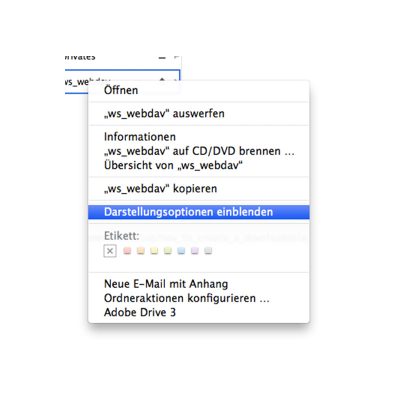
In order to show file icons and previews, the Finder has to download files completely.
In order to avoid this, you should deactivate the following options within the display options (e.g. by right clicking on the volume -> “show display options”):
- show icon preview
- show preview
WebDAV integration in Windows Vista, 7, 8 & 10: Preparations
Back to topTo enable WebDAV access on Windows Vista, 7, 8 or 10, you first have to change a setting in the windows registry.
Start regedit.exe and locate the registry key:
HKEY_LOCAL_MACHINE\SYSTEM\CurrentControlSet\Services\WebClient\Parameters
There, edit the key “BasicAuthLevel”. If it does not exist yet, then create it (with type DWORD).
Set the value of “BasicAuthLevel” to 2.
Exit Registry editor and restart your computer.
WebDAV integration in Windows Vista, 7, 8 & 10
Back to top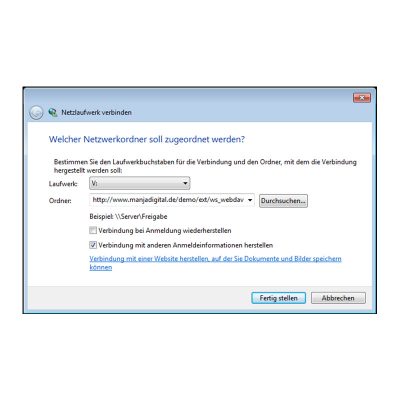
In Windows Explorer, open the “Computer” icon (the page showing your computer drives).
Click on “Map network drive”. Enter the WebDAV URL in the “Folder” text field. Also activate the “Connect using different credentials” option.
Click on “Finish”. Windows will now try to connect to the server. It will ask you for user name and password; enter the user name and password for your Manja user account.
WebDAV integration in Windows XP
Back to topOpen Windows Explorer or “My Computer”. In the “Tools” menu, select “Map network drive”.
In the following window, click on “Sign up for online storage…”. Click “Next”, then “Choose another network location” and then click “Next” again.
Now enter the WebDAV URL and click “Next” again. You will be asked for user name and password; enter the user name and password for your Manja user account.
Finally you will be asked to enter a name for the new network location. You can enter any name you like.
Configurate Windows File Size Limits
Back to top50MB (50000000 bytes) max for WebDAV.This causes one of the following error messages:
- “Cannot Copy FileName: Cannot read from the source file or disk” (Windows Vista, XP SP2 or XP SP1 with security update 896426)
- “Error 0x800700DF: The file size exceeds the limit allowed and cannot be saved.” (Windows 7)
This limitation can only be deactivated on the respective PC by changing a registry key.
Configurate Windows Performance
Back to top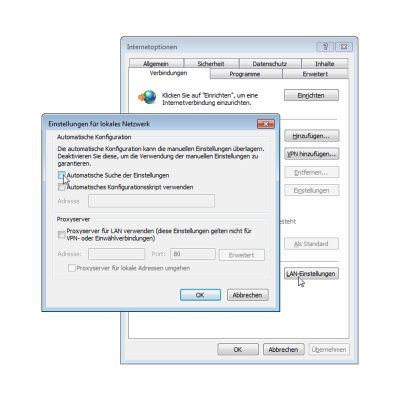
All versions
If possible, use the detail or list view, or “small icons”. In views with large icons or tiles, Windows downloads all the files of the opened folder in order to create the preview.
Windows 7
WebDAV in Windows 7 can be severely limited by a setting in Internet Explorer. It is essential for you to check and disable this setting:
Internet Explorer -> Tools -> Internet options -> Connections -> LAN settings -> Automatically detect settings.
Other WebDAV Clients
Back to topIf you have issues with the WebDAV client integrated in your operating system or if you are looking for alternatives for some other reason, you can also use one of the many other clients.
For example:
Directories, Categories, and Permissions
Back to topIn order for a user to be authorized to create, rename, or delete WebDAV directories, the following conditions are required:
- must have a manager role
- must be authorized to “edit categories” for the respective directory.
This, however, applies only if the first category tree is used for WebDAV (ws_webdav.ini: root_tree_id=1).
If a different category tree is used, the user must have the administrator role in order to create, rename, or delete directories.
