Documentation

Administration

Create categories in the system

Be it a thematic classification, a classification by department, or a classification by quality (and consequently the usability of the material in different media), or be it a purely internal company classification (e.g. based on the department of the employee who uploaded the file): The choice is yours, you have full control.

How to create a new category within a category tree is described in this chapter.

What categories and category trees are is described and explained in more detail in the Categories and Category Trees chapter of our documentation.

Tip: Under Features & Add-ons we have compiled an informative overview of all our features. Additionally, we offer more information about categories on our page Manage and Organize Assets.
Add a new category

Back to top

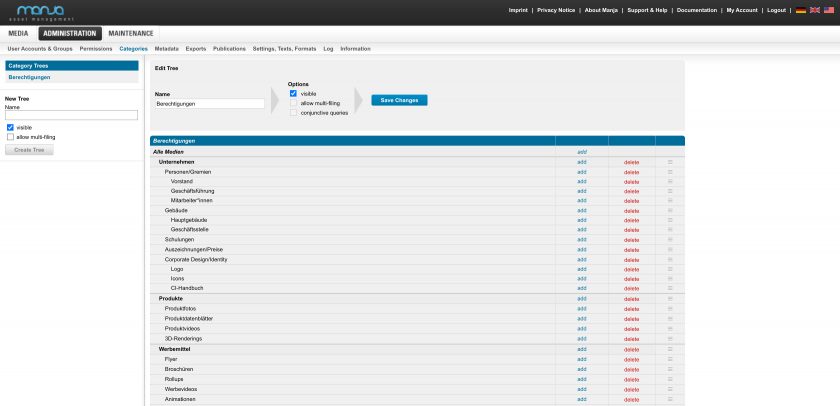
On the left side, you can see the existing category trees. Below you can find the form to create a new tree.

If you click on a tree on the left side, the form for editing the tree appears on the right side, as well as all of its categories below.

Clicking on “edit” – to the right of the respective category – opens the editing form where you can change the name of the category. Clicking on “add” opens the form for creating a subcategory. Clicking on “delete” removes the respective category, including all of the subcategories.

To the right of each category, you’ll find a drag point that can help you rearrange things: Click on it, keeping the mouse button pressed, and drag the category to the desired position. Categories can only be rearranged within their respective level.

For more information, see also “Categories and category trees” in the documentation.

Categories